Author: Flynn Snyder

Deck Installation – How to Build a Safe and Durable Deck

Deck installation is a large-scale project that requires planning and coordination. Homeowners should choose a contractor with experience and expertise to ensure a safe, functional deck for entertaining or relaxing.

Deck Installation

Joists are installed perpendicular to the house and are supported by a ledger board on the house side and rim joists on the outside. The rim joists are topped with low-maintenance post wraps to help them last longer and achieve a specific aesthetic. Contact Deck Builders Baltimore County for professional help.

A deck is an outdoor living space that is a perfect place to relax, unwind, and enjoy the scenery. However, a deck must be built properly to ensure that it’s safe and durable. This includes proper footings, framing, and hardware. It is also important to have a design plan that is approved by a structural engineer. The structural engineer will evaluate the deck’s load-bearing capacities and foundation depth, helping to prevent future problems like sagging or collapse.

Before beginning the actual building of your deck, it’s a good idea to create a layout that will help guide the construction process. This will help make the project run smoothly and avoid mistakes that can cost you time, money, or even the entire deck. A layout plan will help you determine the size and location of your decking, stairs, and railings. It will also help you select the right fasteners and decking materials for your project.

Decks need to be framed using lumber that can withstand heavy loads and lateral forces from wind, snow, and rain. In most cases, joists will be installed perpendicular to the house with a ledger board on one side and a beam on the other. The outer joists, which are often referred to as rim or band joists, are supported by the ledger and sometimes by additional joists.

Joists must be anchored to the house with deck bolts or screws, and flashing should be installed above the ledger board to prevent water from entering between the house and the deck. It’s also important to use deck joist hangers to securely fasten the joists to a ledger board, beam, or rim board.

Framing

Getting the deck framing right is essential to building a solid and durable structure that will last as long as the house it hangs from. Smart details for ledgers, posts and joists make the difference between an ordinary deck and one that can stand up to abrasion, moisture, and the occasional winter heave.

Using an appropriate-sized drill bit for the fastener size, predrill holes in each deck board location. This will prevent the wood from splitting as you drive the fastener into place. For a cleaner look, use stainless steel fasteners when installing deck boards. Fasteners made from anything else will leave unattractive blemishes and can cause the wood to break down prematurely.

To keep the joists and beams properly aligned, use a framing square and 4′ level to check the alignment of each corner. This highly accurate method leaves little room for error and helps ensure a sturdy deck frame.

Rim joists (also called end joists) and beams are the main load-bearing components of your deck. They’re located on both sides of the ledger and form a bridge between your house and your new deck.

For stability, the rim and beams need to be connected to each other with either joist hangers or diagonal bracing. Both methods increase the strength of your deck, reducing the chances of it shifting or swaying under stress.

For older houses with thick timber mudsills, Tom often uses lag screws to secure the 2x rim joists to the sill plate. In homes of more recent vintage, he uses joist hangers to connect the rim joists to the 2x ledger.

Posts

Posts stand under the deck beams and transfer the load of the structure to concrete footings sunk in the ground. Local building codes may dictate minimum post sizes and spacing to ensure safety. The height of the deck will also influence post size requirements, as larger posts can handle greater forces and leverage.

When installing a deck, you will need to determine the location of the posts and mark their locations on the deck frame. You will also need to dig or use post anchors to set the posts firmly in the ground. It’s important to accurately install the posts, because they will be the center of the structure and must be strong enough to support the weight of the deck boards.

The posts can be buried in the ground, or they can rise above the deck level. If you choose to bury the posts, it’s best to have them at least 6 inches below the frost line in your area. This will help prevent the posts from rotting over time. If you opt to raise the posts, it’s possible to use a post anchor system that will save you the work of digging a hole and pouring concrete.

You can also use a post bracket to connect the posts to the floor joists. This is a fast and economical method, but you must make sure the brackets are installed correctly. Use a level to check for plumb and predrill the holes for lag screws or nails.

Posts can be made of wood or a composite material that combines wood fibers with recycled plastics and other materials. These materials are weather and insect-resistant, don’t require staining or resealing and are available in a variety of styles and colors.

Boards

Many homeowners prefer natural wood decking for its warm good looks, cost effectiveness and the ease with which it can be stained or oiled to preserve its color and protect against weather damage. But, despite its relative durability, traditional wood requires a great deal of upkeep and deteriorates quickly in the sun. Alternatives such as capped composite or engineered wood can offer the beauty of real wood with far less maintenance.

When installing the decking boards, you should always pre drill each hole with a drill bit that matches the screw size. Failing to do so may cause the board to split and will lead to unattractive blemishes in the decking surface. Additionally, the use of fasteners made of anything other than 305 stainless steel will cause rust and corrosion which could ultimately weaken the decking.

After you’ve drilled each hole, insert the fastener. Typically you will insert the head of the screw so that it is flush with the surface of the decking. Then you will drive the screw down into the joist until it’s at least 1/4 in below the decking surface.

The last few boards you install can be fixed using a hidden fastener system. The spacer tabs on these systems fit into a groove in the decking boards to hide the screw heads from view. This is a good way to finish the deck if you ran out of decking or just didn’t have enough time to get to it.

A joist tape is also a smart idea to help with water resistance in your deck’s understructure. It will be installed across the joists and ledger board to protect against moisture and will prevent the deck from rot.

Railings

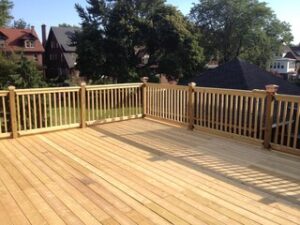
The railings are the final touch on a deck and come in many different designs to complement your home. They are also a safety feature as they prevent people from falling off the deck. For this reason, local building codes have strict rules about the height of a railing and how closely it should be spaced. At Archadeck, we only offer railing options that comply with these rules and will pass a building inspection.

Traditional Style: Wooden railings and balusters pair well with most home styles. They are available in a variety of species such as cedar and redwood, which each have their own defining color, natural resistance to rot, and unique look. We also carry low maintenance composite railings that can be stained or painted to match your deck.

Modern Style: Metal and cable rails are a newer design that pairs nicely with contemporary homes. They have a clean and sleek look, with minimal visual obstruction that allows the view to remain open. They are available in a wide range of colors and can be combined with a wooden or composite deck.

Consider accessibility: If a family member has mobility issues, then a handrail should be part of the deck design. Whether it’s made of wood, composite, aluminum, iron, or glass, a good handrail can provide stability for those who need assistance getting around the deck.

For this reason, it is important to choose a railing design that meets ADA guidelines for handrail height and grip size. Our professionals are here to help you navigate the various design and material choices that can satisfy your specific needs. We can also advise you on how to meet local building code requirements.

Understanding the Complexities of Foundation Repair

Foundation repair is essential to maintaining the structural integrity of any building. A damaged foundation can lead to uneven floors, cracks in walls, and compromised safety.

Foundation Repair

Early detection and timely repairs prevent further damage and reduce costs. Professional assessment ensures that the right repair method is applied. Visit Website to learn more.

Foundation problems often result from soil movement, moisture imbalance, and poor construction. Soil expansion and contraction create pressure on the foundation. Excess moisture weakens the soil, causing the foundation to shift. Poor drainage and plumbing leaks also contribute to instability.

Cracks in walls and floors are early signs of foundation issues. Uneven floors and doors that fail to close properly suggest structural movement. Gaps between walls and ceilings indicate stress on the foundation. Identifying these signs early allows for quicker resolution.

Repair methods depend on the severity and cause of the damage. Minor cracks may require sealing to prevent water infiltration. More extensive damage may need pier installation or slab lifting. Each solution requires a detailed understanding of the foundation’s structure.

Pier systems stabilize foundations by transferring weight to deeper soil layers. Helical piers are screwed into the ground, providing immediate support. Push piers use hydraulic pressure to drive support into stable soil. These methods restore foundation stability and prevent further sinking.

Slab lifting corrects uneven floors and sunken slabs. Foam injection and mudjacking are common techniques. Foam expands under the slab, raising it to the correct level. Mudjacking involves pumping a cement mixture to fill gaps and lift the slab.

Soil stabilization addresses underlying causes of foundation movement. Chemical injections strengthen loose soil, reducing shifting. Drainage improvement redirects water away from the foundation. Controlling moisture levels prevents soil expansion and contraction.

Basement foundations face unique challenges due to water pressure. Hydrostatic pressure causes walls to bow and crack. Waterproofing systems prevent water infiltration and relieve pressure. Interior and exterior drainage solutions help protect basement foundations.

Crawl space foundations are vulnerable to moisture and pest damage. Poor ventilation allows humidity to build up, weakening wooden supports. Encapsulation creates a moisture barrier, protecting the structure. Dehumidifiers maintain optimal humidity levels, preventing rot and mold.

Tree roots can also impact foundation stability. Roots absorb moisture from the soil, causing it to shrink and settle. Removing trees near the foundation or installing root barriers prevents damage. Maintaining consistent soil moisture reduces the impact of root growth.

Seasonal changes affect soil movement and foundation stability. Dry seasons cause soil to contract, creating gaps beneath the foundation. Wet seasons increase soil expansion, applying pressure to the structure. Maintaining balanced soil moisture minimizes seasonal impact.

Foundation settlement occurs naturally over time but can be accelerated by soil erosion and poor construction. Differential settlement causes uneven sinking, leading to structural stress. Structural reinforcements and underpinning correct uneven settlement. Early correction prevents long-term damage.

Earthquakes and ground vibrations create sudden stress on foundations. Reinforced concrete and flexible building materials reduce earthquake damage. Retrofitting older buildings with seismic reinforcements improves resilience. Assessing foundation strength helps prepare for seismic activity.

Foundation repair involves balancing structural integrity and aesthetic restoration. Repairing cracks and leveling floors improve the building’s appearance. Structural reinforcements prevent future damage and maintain long-term stability. A comprehensive repair plan addresses both function and appearance.

Drainage improvements play a key role in foundation repair. Poor drainage allows water to pool around the foundation, weakening the soil. Installing gutters, downspouts, and French drains diverts water away from the structure. Maintaining proper drainage reduces pressure on the foundation.

Concrete foundations are susceptible to cracking and surface damage. Freeze-thaw cycles cause concrete to expand and contract, leading to cracks. Epoxy and polyurethane injections seal cracks and restore strength. Preventing moisture infiltration protects concrete from further damage.

Foundation repair requires specialized tools and techniques. Hydraulic jacks, pressure injectors, and laser levels ensure precise adjustments. Soil testing helps determine the best repair approach. Experienced contractors assess site conditions to develop a tailored repair strategy.

Building codes and regulations influence foundation repair methods. Repairs must meet structural safety standards and environmental guidelines. Permits and inspections ensure compliance with local requirements. Adhering to codes prevents future liability and safety issues.

Foundation repair costs vary based on the extent of damage and repair method. Minor crack repairs cost less than extensive pier installation. Investing in preventive measures reduces long-term repair costs. Early action minimizes structural damage and repair expenses.

Property value increases with a stable foundation. Buyers are more confident in properties with documented foundation repairs. Structural integrity reduces long-term maintenance costs. A solid foundation enhances overall property durability and market value.

Historical buildings often require specialized foundation repair techniques. Preserving architectural integrity while reinforcing structure is challenging. Custom repair solutions respect historical materials and design. Expertise in historical restoration ensures accurate and effective repairs.

Technological advances have improved foundation repair methods. Laser-guided leveling and real-time pressure monitoring increase precision. Drones and imaging tools assess foundation conditions without excavation. Technology improves accuracy and reduces repair time.

Foundation repair also involves cosmetic restoration. Filling cracks and resurfacing concrete restores the building’s appearance. Matching materials and finishes ensures consistency with the original design. Proper restoration enhances both structural and visual quality.

Foundation inspections identify hidden damage and vulnerabilities. Ground-penetrating radar detects voids and weak soil layers. Infrared imaging reveals moisture infiltration and heat loss. Regular inspections provide early warnings and guide maintenance strategies.

Preventive maintenance strengthens foundations against future damage. Soil stabilization and moisture control reduce environmental stress. Reinforcing weak areas prevents structural weakness. Scheduled maintenance extends foundation lifespan and reduces repair frequency.

Insurance coverage for foundation repair varies based on damage cause and policy terms. Damage from soil movement and natural disasters may not be covered. Understanding policy details helps determine repair costs and financial responsibility. Insurance reviews guide repair planning.

Construction techniques influence foundation stability and repair complexity. Shallow foundations are more vulnerable to soil movement. Deep foundations distribute weight to more stable soil layers. Understanding construction methods informs repair strategies.

Environmental impact influences foundation repair methods. Minimizing soil disruption and using eco-friendly materials reduce environmental harm. Sustainable drainage solutions protect soil quality and prevent erosion. Eco-conscious repair practices balance structural and environmental needs.

Foundation repair enhances building safety and longevity. Stabilizing the foundation prevents structural failures and safety hazards. Addressing underlying causes protects against recurring damage. A strong foundation ensures the building’s long-term performance and value.

Foundation repair requires expertise, precision, and thorough planning. Understanding soil behavior, structural load, and repair methods ensures effective results. Professional assessment and tailored solutions restore foundation strength and stability. Investing in foundation repair protects the building’s future and value.

How to Find a Great Hair Salon

A great Curly Hair Salon NYC should be a place where you feel beautiful, fresh and heard. It should also be a place where you can get your hair done in a way that suits your personality and your lifestyle. The stylists should be trained to listen to you and understand your needs, goals and aspirations. 

Hair Salon

They should also be able to offer advice and suggestions about how best to achieve your goals. The stylists should be able to answer any questions you have about how to care for your hair and maintain it at home.

Many people with curly hair have had terrible experiences at hair salons, either because their stylists weren’t skilled in working with curls or because they simply didn’t want to deal with the challenges that come with working with curly hair. Some even have to drive several hours to find a stylist who can work with their hair type. If you have curly hair, finding a specialist is well worth the effort.

The first step in finding a curl specialist is to search for one within your area. Many people have discovered the right specialist through word of mouth, but you can also check online. There are many forums and websites dedicated to locating specialists in specific cities or states. Often, these sites have detailed information about the services they provide and will list client reviews and photos. Some of these sites allow you to search by hair style, location or name.

Another way to find a curl specialist is to look for one in a beauty salon or barber shop. These are typically located in urban areas and may be franchises or they may be independently owned. Some independent salons offer booth rentals for hairstylists, cosmetologists, nail technicians and estheticians to run their own independent businesses.

In addition to offering various hair and spa treatments, these businesses typically carry a variety of hair products and cosmetics for sale. Some even sell a line of their own branded products. A few of these salons also offer nail and skincare services. Some of these salons require appointments, while others are walk-in only.

Bringing Your Hair Styled

The difference between hair salons and beauty salons is that hair salons specialize in hair services like haircuts, coloring, extensions, and styling, while beauty salons offer more comprehensive spa treatments including skincare and nail care. They also offer a wider range of retail products, such as shampoos, conditioners, and hair accessories. In addition, hair salons often host educational events on hairstyle techniques or new product launches, while beauty salons may host makeup workshops or skincare seminars.

Some hairdressers work for large salon chains, while others have their own private businesses. They can lease chair space from a salon owner or open their own shop after gaining experience and acquiring the proper licenses and certifications. They must have a variety of skills, such as excellent customer service and attention to detail. They must also keep up with the latest trends in hair fashion and technology, as well as follow health and safety guidelines for working with chemicals and using specialized tools and equipment.

A hairstylist’s job is to analyze a client’s hair and discuss stylistic options, including color and hair extension alternatives. Then they will use their tools to create a beautiful and unique look. A stylist may recommend haircare products, such as shampoos and conditioners, styling products, and treatments to help a client maintain their new look between appointments. They also stay informed about the latest trends in hairstyling and attend hair salon shows or conferences.

Some hairdressers and stylists require special training to become certified in specific hair techniques. They must follow strict hygiene standards and be familiar with haircare equipment, such as dryers, blow-dryers, and flat irons. They must also be skilled at cutting and coloring hair, as well as sculpting and shaping it to enhance its natural shape. Some stylists specialize in certain styles, such as curly or wavy hair. Other stylists have a more broad scope of expertise and can work on all types of hair. Many salons offer a range of styling options, such as a keratin treatment or Fusio Dose Densifique, that restores and adds texture to fine hair.

Choosing a Stylist

It’s important to find a stylist who has experience in your desired look. Doing your research ahead of time will help you narrow down the salon options that align with your vision and needs. Check online reviews to get a sense of the salon’s service quality, atmosphere, and stylist expertise. Some stylists also have portfolios on social media that give you a look at their skills and the types of hair they work with.

Finding the right hair stylist isn’t just about technical skill; it’s also about building a relationship that’s based on mutual respect. A strong stylist-client partnership can elevate the entire salon experience. A good stylist will listen to your ideas and offer suggestions, but it’s up to you to communicate how you want to be styled.

When you meet with a potential stylist, it’s helpful to bring reference photos of cuts or styles that you like. This will help you clearly convey your vision to the stylist and avoid any misunderstandings. It’s also a good idea to arrive with clean hair, as this ensures even color application and the best possible results.

It’s not uncommon to be nervous about trying a new salon or stylist. But with adequate preparation and effective communication, you’ll be surprised at how quickly you feel at ease in a new chair.

Remember that a stylist’s business depends on their clients’ satisfaction. If you’re not happy with your haircut, you may not return or refer friends. Be honest about your expectations and be willing to try a few different approaches until you find the one that’s just right for you.

Getting a Cut

When you’re ready to get a haircut, consult with the stylist beforehand about what you want. Be specific and use your hands to show where you want the cut to fall. This will ensure that you and your stylist are on the same page, and that you end up with a look that you love. You can also brush up on styling terms, such as “layers,” to ensure that you and your stylist are using the same language.

After the consultation, the stylist will proceed to cut your hair. They’ll take their time and be meticulous, ensuring that each snip fits your desired style. When they’re done, they’ll blow-dry and style your hair to show you how it looks and to help you maintain the new look at home. They may also provide tips on products, tools, and techniques that you can use to get the best results at home.

Depending on the salon, they may have a range of different retail products available for purchase. This could include hair products, styling tools, and accessories, or it could be skincare products, makeup, and nail polishes. Some salons even host collaborations with other beauty or fashion professionals, such as hairstylists, barbers, or makeup artists.

Some salons require a waiver or consent form before allowing clients to receive certain chemical treatments, like hair dyes or hair bleaches. These forms typically ask for an emergency contact in case of a bad reaction. Some salons may also perform a test strand on a part of your hair to see how it will respond to the product before applying it to the entire head.

Keeping your hair styled and well-maintained isn’t just about looks; it also promotes healthy hair. For this reason, experts recommend getting regular trims to prevent split ends and breakage. Additionally, it’s important to wash your hair regularly, but only with quality shampoos and conditioners that are designed for your hair type. Lastly, it’s recommended to avoid heat-styling your hair too often as this can cause damage. Choosing the right hair salon can make all the difference in your hair’s health and appearance.

Prevent Future Damage With Sealcoating

Asphalt pavement is primarily rock and gravel aggregate held together by a binder. Chemicals like gasoline, motor oil, antifreeze and de-icing agents, in addition to rain and UV rays, slowly degrade asphalt by oxidizing the binder.

Sealcoating

Rochester NY Sealcoating prevents this degradation and helps the pavement last longer. It also enhances the aesthetic by hiding cracks and blemishes, making the asphalt look newer and more attractive.

Asphalt is a common material in our modern world and is used in countless ways. Whether it’s your driveway, parking lot or road, asphalt pavement is subjected to constant abuse and wear and tear from the elements, traffic and vehicles. One of the most effective ways to protect your paved surface is by seal coating it. While this won’t repair any cracks or potholes that have already formed, it will prevent future damage and prolong the life of your pavement.

Seal coating is the process of adding a layer of coal-tar or asphalt emulsions over your asphalt surface. The asphalt binders and oils in the sealant form a protective barrier that keeps out water, sun, oil and other oxidizing substances. The seal coat also replenishes degraded asphalt binder and helps to maintain your paved surface.

The primary reason for applying a sealcoat is to protect your asphalt from damage. If you don’t regularly apply a sealcoat, your paved surface will quickly begin to degrade. Rain, UV rays and chemical substances like gasoline, motor oil, salt and de-icing chemicals all contribute to the degradation of your pavement. By sealing your asphalt, you protect it from these damaging substances and extend its lifespan.

Regularly applying a sealcoat will also help to prevent costly repairs down the road. Pavement that is not properly maintained can become brittle due to oxidation and lose its natural flexibility. This brittleness causes the pavement to crack and crumble under pressure from heavy vehicles. By sealing your pavement, you preserve it and allow it to flex under pressure without cracking or breaking.

In addition, a sealcoat will give your paved surface a clean, new appearance. Over time, the sunlight can wash away the black asphalt color and leave it looking dull and washed out. Sealcoating restores the black, glossy finish of your pavement and gives it a new, fresh look. Before starting the process of applying a sealcoat, workers will first clear the area of any debris and dirt. Then, they will flash heat any petroleum stains on the surface to remove them and create a smoother, purer surface for the new sealcoat to bond with.

Prevents Oil and Fuel Spills

The primary function of sealcoating is to serve as a protective barrier, and this includes protecting asphalt surfaces from oil and chemical spills. When these substances seep into unprotected pavement they can cause damage by penetrating the surface and degrading the underlying materials. This type of damage can be expensive to repair and may require removal and replacement of the affected area. Sealcoating protects against these substances by preventing them from penetrating the asphalt, which makes cleanup significantly easier and less costly.

The best way to deal with oil and chemical spills on asphalt is to prevent them from occurring in the first place. When petroleum products such as gasoline, grease and diesel are pumped near an unsealed surface they can leak into the asphalt, causing severe damage. This is because petroleum products are made from similar substances and they easily dissolve the asphalt binder. By sealing the pavement, you can prevent these chemicals from coming into contact with the underlying material and damaging it.

Sealcoating also provides a protective layer that protects the asphalt from the high-volume water pressure and detergents used to wash vehicles and equipment. This helps to keep the pavement looking new and attractive and minimizes damage caused by the washing process.

Oil stains are a common problem on asphalt pavement, and they can be very difficult to remove from the surface. However, the oil stains are only on the surface of the pavement, and they will wash away in the rain when it is properly sealed. Sealcoating keeps the oil stains from staining the asphalt, so you can spend less time and money cleaning them up and more time enjoying your beautiful driveway or parking lot.

In addition to preventing oil and fuel spills, the protective layer provided by sealcoating can help to prevent snow and salt damage. The salt that is used to melt ice on roads and sidewalks can destroy the asphalt by eating it away. By applying a thick layer of sealcoat, you can protect your asphalt from the damaging effects of salt and other winter weather conditions.

Prevents Cracking

Asphalt cracking is the most common source of pavement damage and, with regular sealcoating and proper maintenance, it can be prevented. Sealcoating creates a protective layer over the asphalt surface, protecting it from water penetration and chemical oxidation. It also helps prevent the damaging effects of sun exposure. By reducing the amount of time your asphalt is exposed to weather elements, sealcoating extends the life of the surface and reduces the frequency and cost of repairs.

Sealcoating is most effective when performed on a regular basis to protect the integrity of your parking lot. Generally, it is best to apply a sealcoat every two to three years. However, if you have recently experienced a lot of vehicular traffic or oil spills on the surface, you may want to consider applying a sealcoat sooner than that.

The key to a successful sealcoating is the preparation and application of coal tar-based pavement sealer in optimal conditions. This includes ensuring the asphalt surface is free of dirt, debris and moisture. This step is essential, as the sealant needs to adhere to the asphalt for it to be effective.

Another important consideration is the climate conditions. The temperature should be between 59 and 85 degrees Fahrenheit and the humidity level should be relatively low. If rain is expected within 24 hours following the application, workers should postpone the project until it can dry properly.

In addition to preventing future cracking, sealcoating provides an attractive and well-maintained appearance to your parking lot. Its smooth, dark appearance enhances curb appeal and reflects the professionalism of your business. Furthermore, smooth pavement is easier to clean, which can save you money on labor costs and help you comply with local environmental regulations.

Evaluating the Existing Pavement Damage

When evaluating whether to invest in sealcoating or crack sealing, property owners must look at their overall maintenance goals. While sealcoating is a more comprehensive preventative treatment, crack sealing is an excellent treatment for addressing specific vulnerabilities that can dramatically shorten the lifespan of your asphalt. By implementing both treatments as part of a proactive maintenance strategy, you can ensure that your parking lot is protected for decades.

Saves Money

Sealcoating is an inexpensive maintenance procedure that protects the value of asphalt, extending its life and saving money in repairs. While it may seem like a waste of time and money to have your asphalt parking lot or driveway sealed when you already have cracks, potholes, or other damage, these repairs are much more costly in the long run than paying for sealcoating.

A smooth, black surface of sealcoating helps your parking lot or driveway maintain a consistent appearance and reduces signs of wear. This sends the message to your customers or tenants that you care about the appearance of your property and are committed to its maintenance. This also helps retain tenants, as well as attracting new ones.

When untreated asphalt starts to deteriorate, moisture enters tiny cracks and erodes the base underneath. The repeated freezing and thawing of water causes further damage, which is why it is so important to have your pavement sealed as soon as possible when it shows signs of wear.

The smooth surface of a sealcoated asphalt pavement makes snow removal easier and quicker in the winter, as well as keeping dirt from building up throughout the year. Pavement that is properly maintained is safer for pedestrians and vehicles, which lowers liability risks for business owners.

Although some people try to DIY sealcoating, this is usually a bad idea. It takes special equipment and supplies to get the job done correctly. You may save some money by doing it yourself, but you will likely spend more in materials and have to redo the work due to mistakes that are bound to happen.

In addition, seal coating is best performed by professional contractors who use high-quality materials. It is also important to know that sealcoating is only effective on a clean, stable pavement surface. If your pavement is damaged, it will look better for a short period of time, but the damage will continue to deteriorate and require further repair. A professional contractor can assess your parking lot or driveway to determine whether it is ready for sealcoating. If it is not, they will recommend other maintenance procedures to prepare the pavement for sealing.

Navigation